FINAL PROJECT:
RECORD PLAYER
AT A GLANCE:
Project: turntable
Machines used: laser, CNC, 3D printer, woodshop tools, Arduino
Machines used: laser, CNC, 3D printer, woodshop tools, Arduino
INTRODUCTION:
When searching for a project that I could do for this semester of Big IDEA, I knew I wanted to make something that was both practical but also fun for me to make. I also wanted a project that would challenge me, which was no problem as this project has easily been one of the most complex and difficult things I have ever made.
I landed on a record player almost immediately, due to my growing interest in music and my desire to learn more about records as a format. My initial worries were that this project would be out of reach due to the complexity required to create good sound, however after looking further into record players, I realized it would not be as much of a challenge as I first thought.
A goal I had for myself when I first signed up for this class was to produce as many of the components myself as I could, that way I was taking full advantage of the machines in the Innovation Center. There were some things like the pre-amp, needle or stepper motor that I knew I could not make, however I did want to make things like the tonearm, dust cover and platter.
This site will document my journey, from start to finish, ending with completion of this project. I will first go through pre-work, then move on to how I used each machine, finally finishing with a conclusion and videos of my results.
RESEARCH, DESIGN AND DEVELOPMENT
Designer Notebook Research:
|
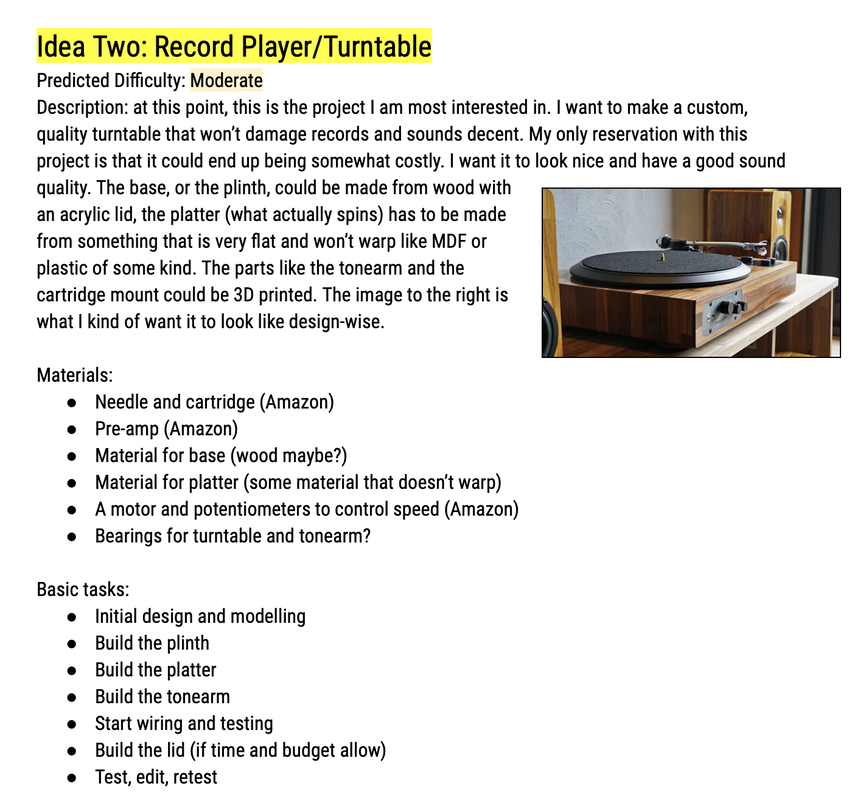
This was some of the first work I did for this project. The picture to the right was a design reference, and I think I made something similar, while also putting my own spin on it. Many of the materials I initially listed ended up in the final product.
Aesthetics were a big part of many of the decisions I made in this project, although I made sure not to sacrifice looks for functionality. I knew I wanted this project to be made from wood, so I bought a roll of the black PLA to make the 3D printed parts contrast against the wood. I followed a rough version of the timeline I outlined, however a majority of the work was done in April and May. In hindsight, I would have tried to get into the shop much earlier, so I would have more time to refine my designs, but in the end this was not much of a problem, as I am very happy with what I ended up with. |
|
Initial Sketch:
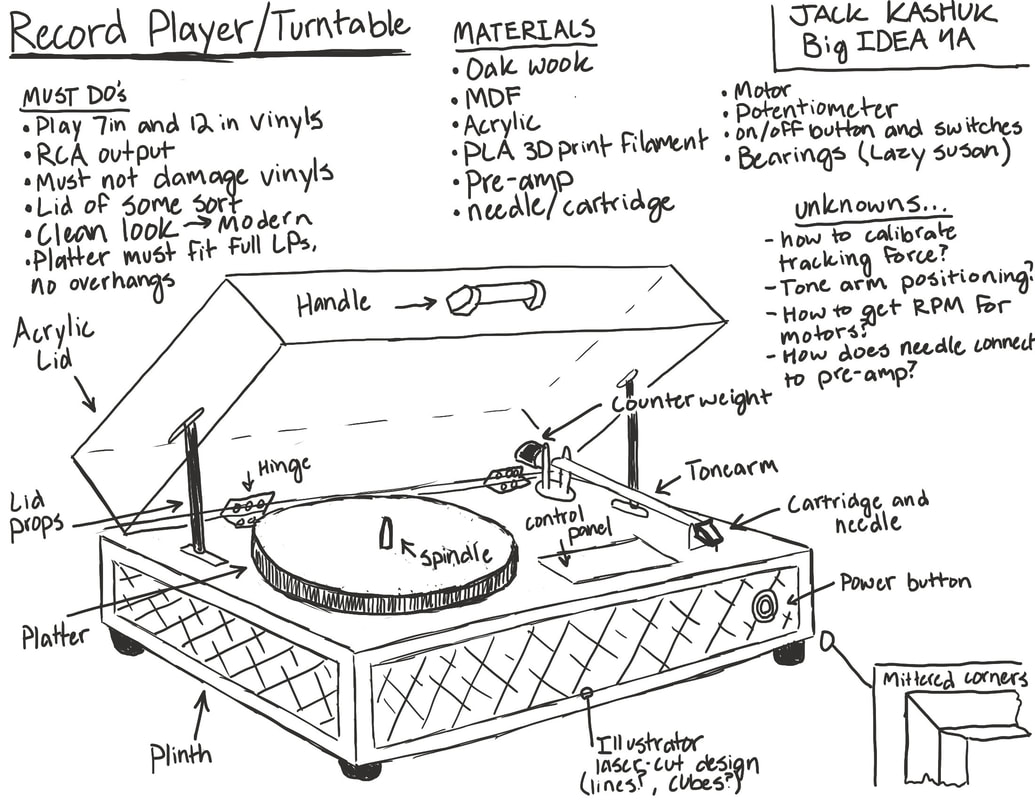
After I had decided on my final project, the first thing I did was go into Photoshop and create a sketch of what I wanted this project to look like. Many of the features that are in my final project are pictured here, with slight changes. Many of the unknowns and challenges I initially had ended up being some of my biggest issues further down the line.
PRODUCTION:
3D Printer

|
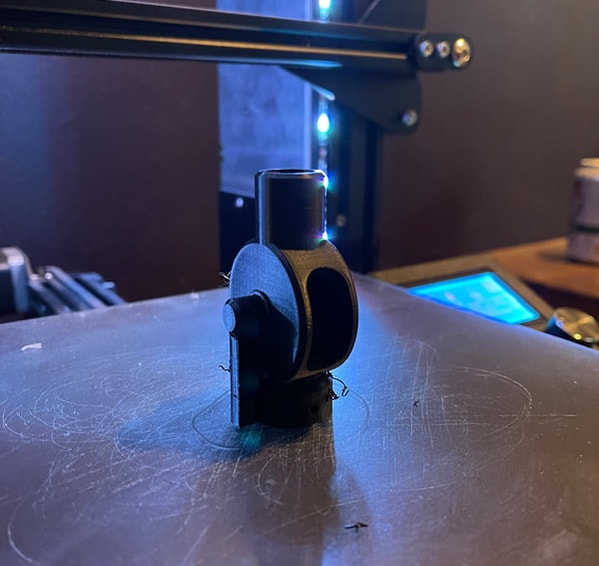
During this semester, I had the advantage and privilege of owning my own 3D printer, which allowed me to tweak and refine my designs much more than if I was limited to only using the printers when I was in the Innovation Center. I was also able to print while our first quarter was mostly virtual, which was a huge help. All parts were designed in Fusion 360. I used a close-to-stock Ender 3 Pro along side Ultimaker Cura to format my parts for printing.
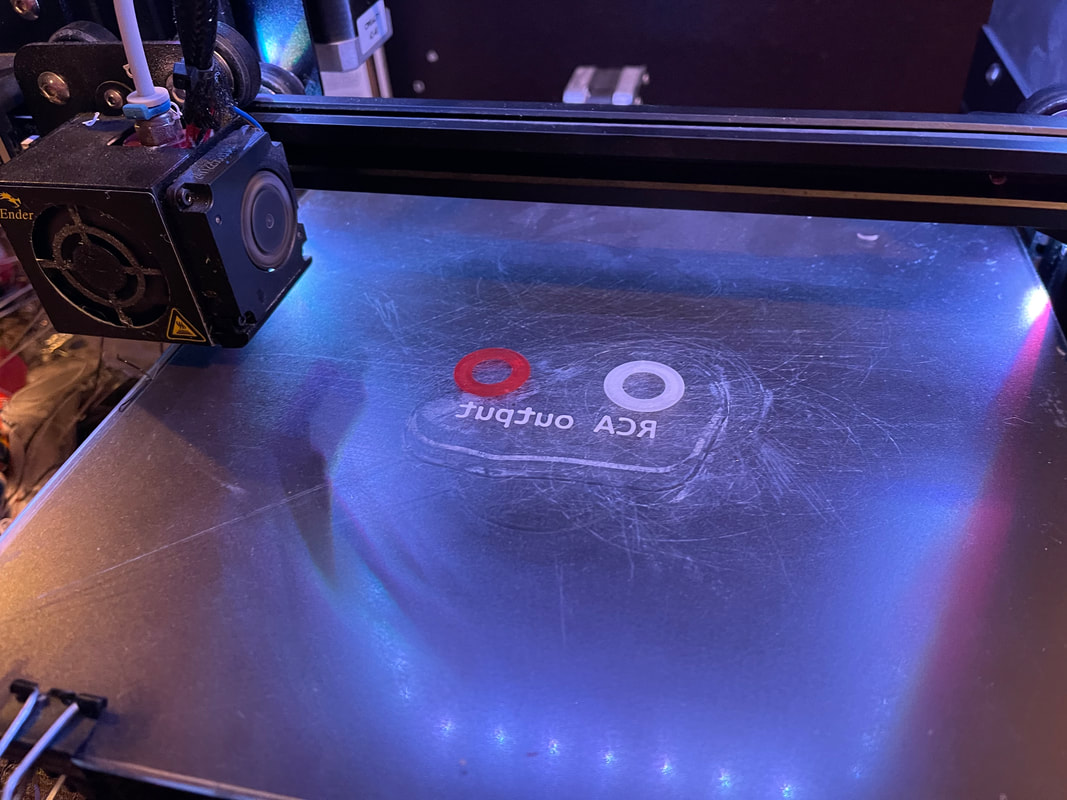
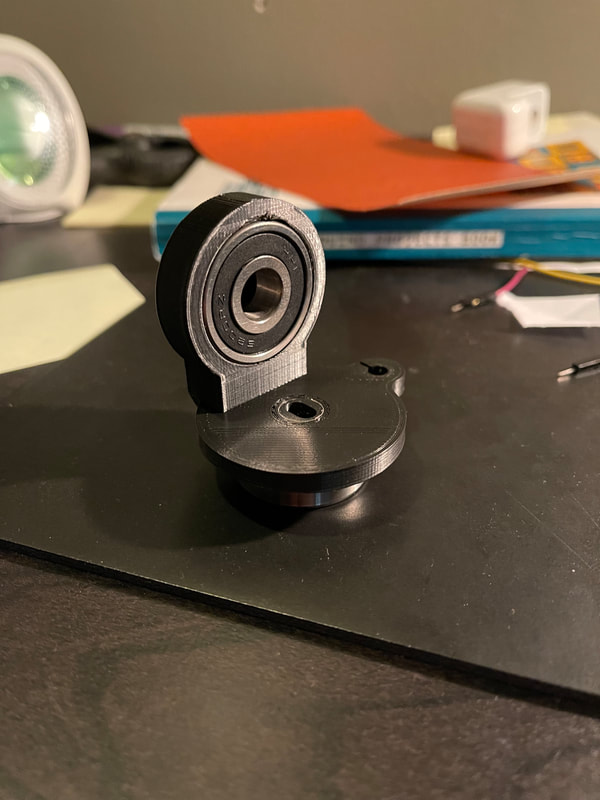
One of the main components of my project is the tonearm. This is the hinged arm that houses the cartridge and needle, as well as allowing it to run along the circular grooves of the record. I knew from the start that I wanted to design and produce as many of the parts and components as I could in this project, and in the end no component better exemplifies that then the tonearm. All of the parts, save the bearings and cartridge were all designed and printed by me. Also 3D printed are the "IO shields" that hold my buttons, RCA outputs and power input components, as well as the internal bracket to hold my stepper motor in place.. I had a ton of fun fine tuning a technique where I make parts with letters directly printed into them, which is shown by the labels on these parts. Having a printer constantly at my disposal was both a blessing and a curse. It was amazing because I could quickly pump out parts and prototype pieces, and I wouldn't have to wait as long to order the parts online or have them print at school. However, it was also a disadvantage because I soon became obsessed with creating the most efficient and good-looking version of any of the said pieces, meaning some of the pieces went through close to a dozen iterations. If I were to have used the printers in the lab, I would have had to be more reserved and resourceful, and make sure what I was printing was my intended final version. 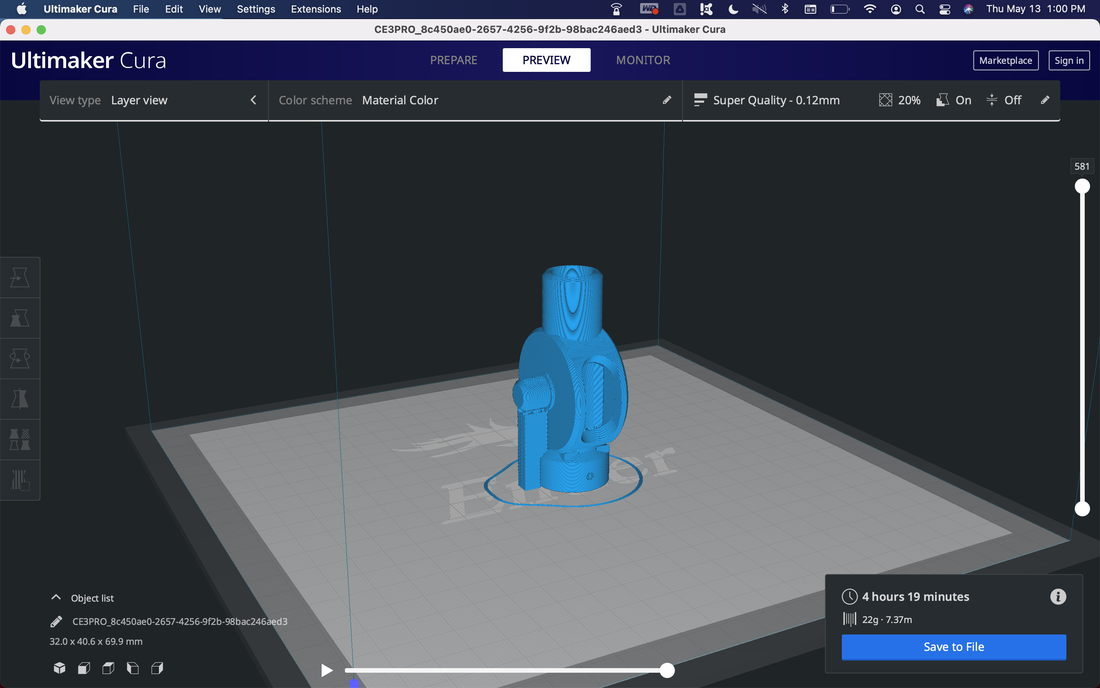
Here is an example of what a piece looks like after being sliced in Cura
|
CNC Router
|
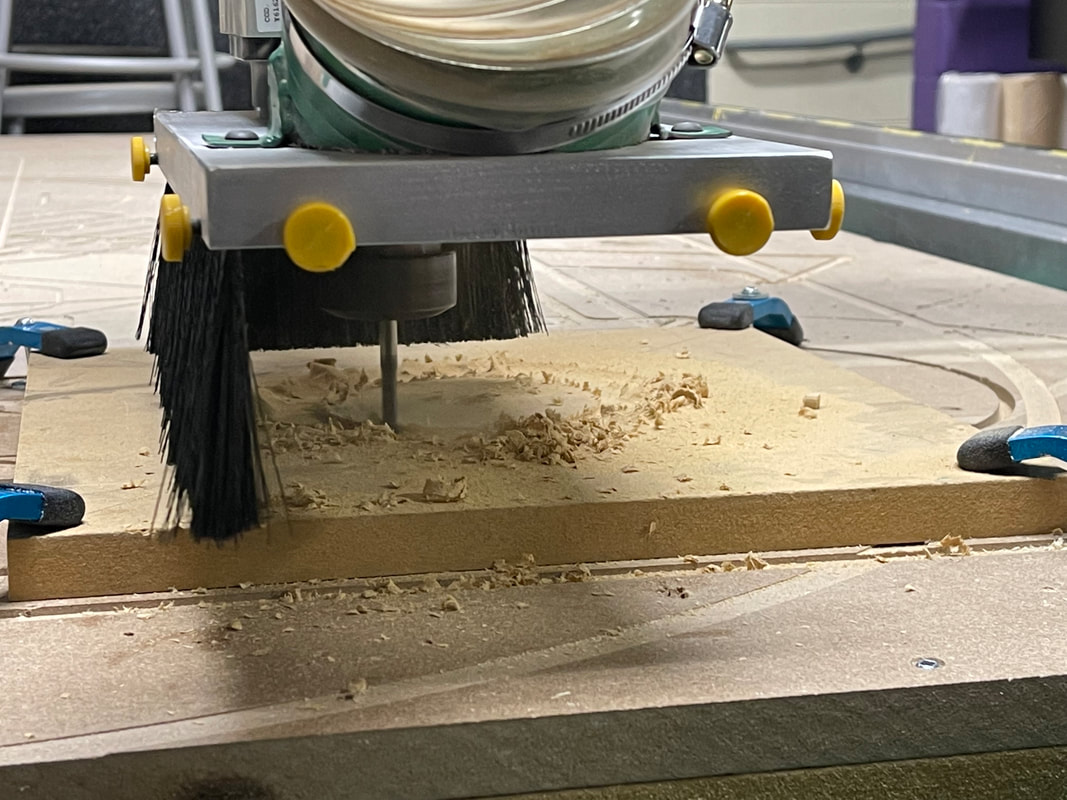
The CNC router quickly became an essential tool for me when making this project. I used this piece of machinery to make the round platter, as well as the circular inlay on the top of the plinth. I was happy to be able to use this technology, as I wanted to learn how to use machines that I have never used before, like the CNC and laser.
I had never used the CNC router before this semester, which meant I had to learn the ropes and learn how to generate a path in Fusion 360. Since the bulk of my project was designed in Fusion anyway, it made it much easier to get started making these paths. I did however, need help optimizing the type of tool path for the cut I made in each part. My first path for the top of the plinth had over 130,000 lines of gcode, which was due to the number of times the bit had to circle. The platter had a much lower number, at around 500. The hardness of the oak wood combined with the speed of the router head made for some difficulty. And by difficulty I mean breaking three separate router bits. But eventually we got the paths cut and the pieces were ready for sanding and finishing. 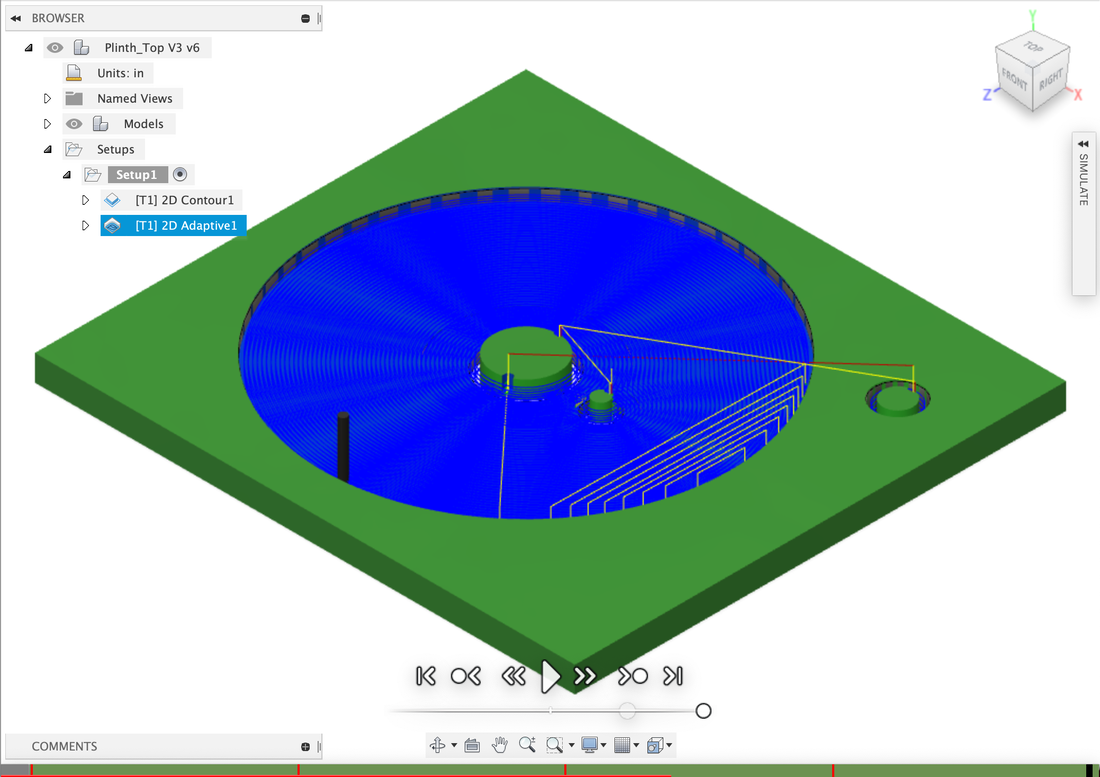
Here is what the router path for the plinth top looked like when set up in Fusion 360
|


|
Laser Engraver
|
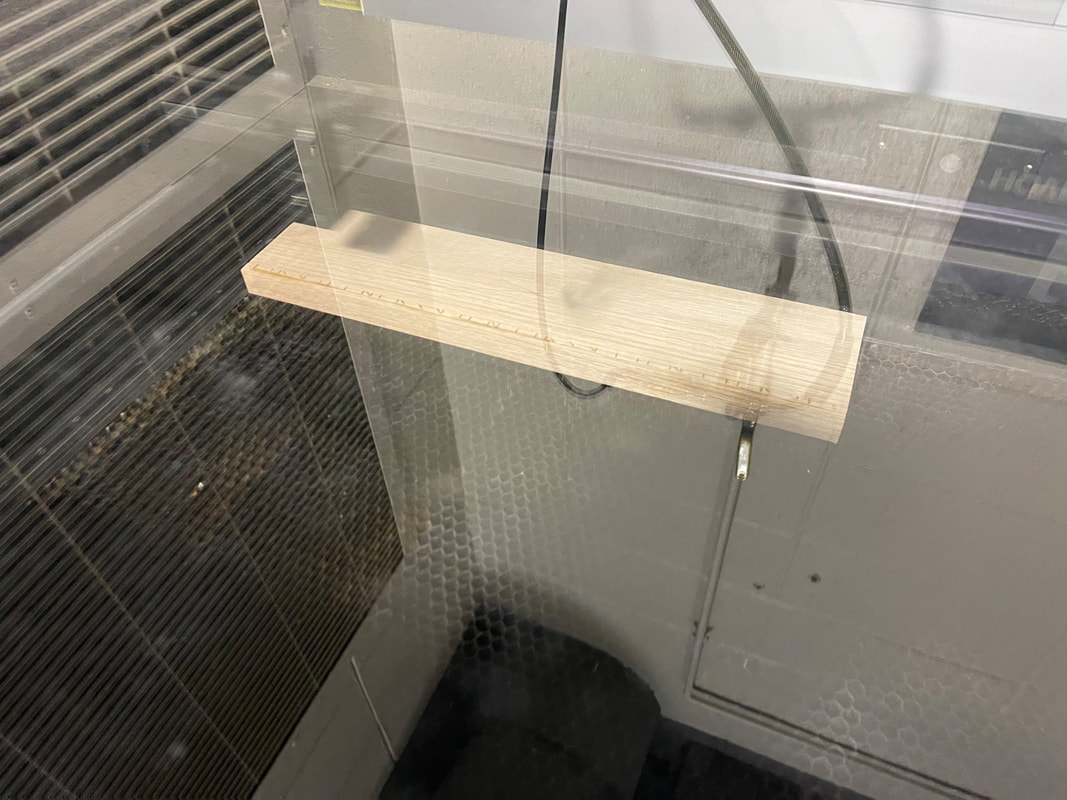
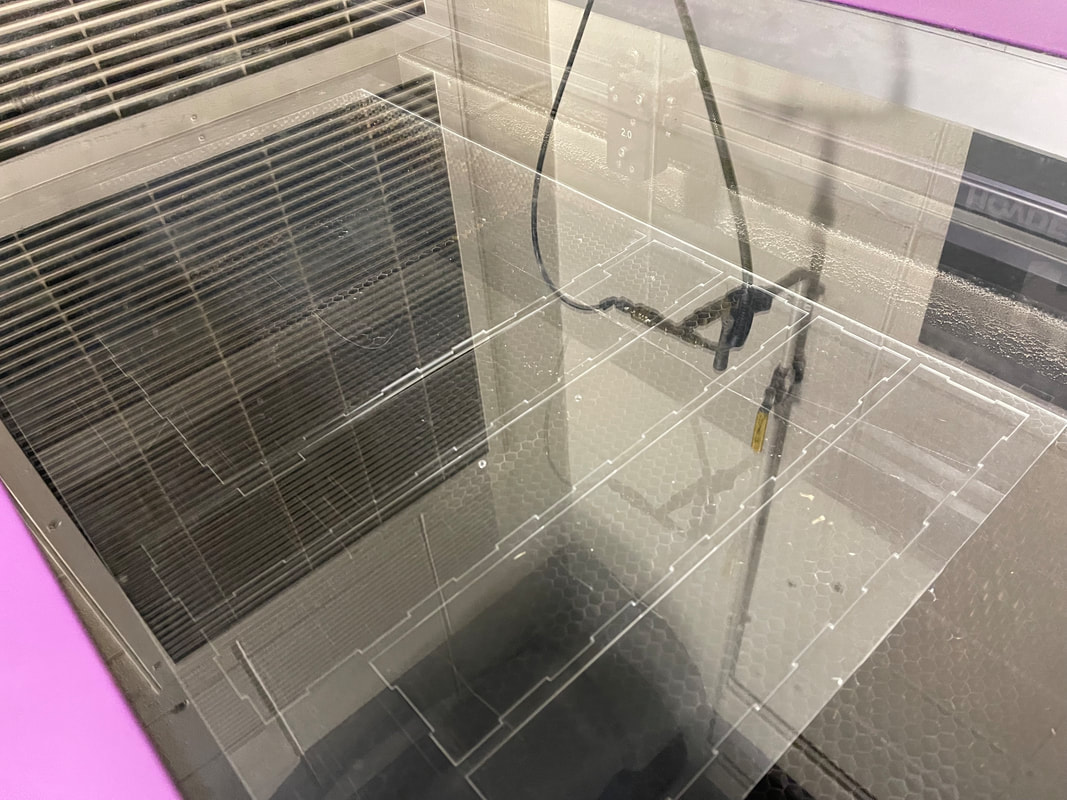
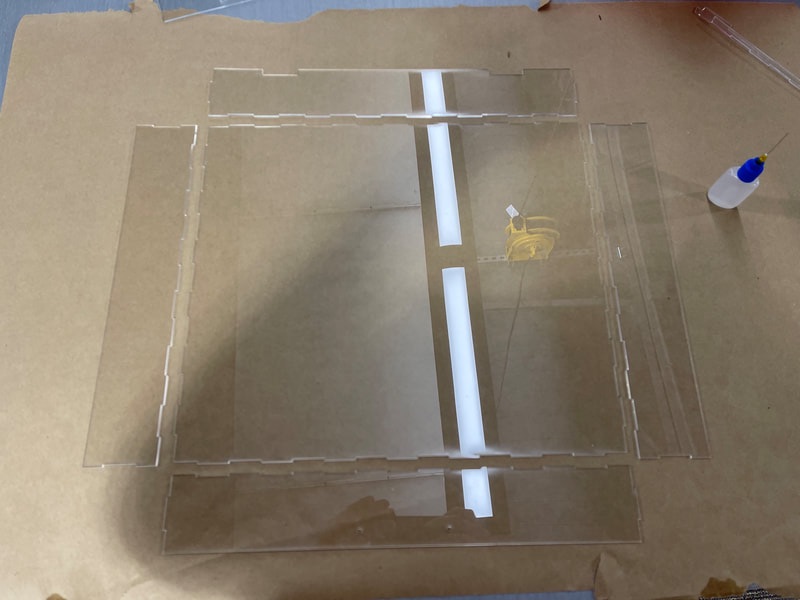
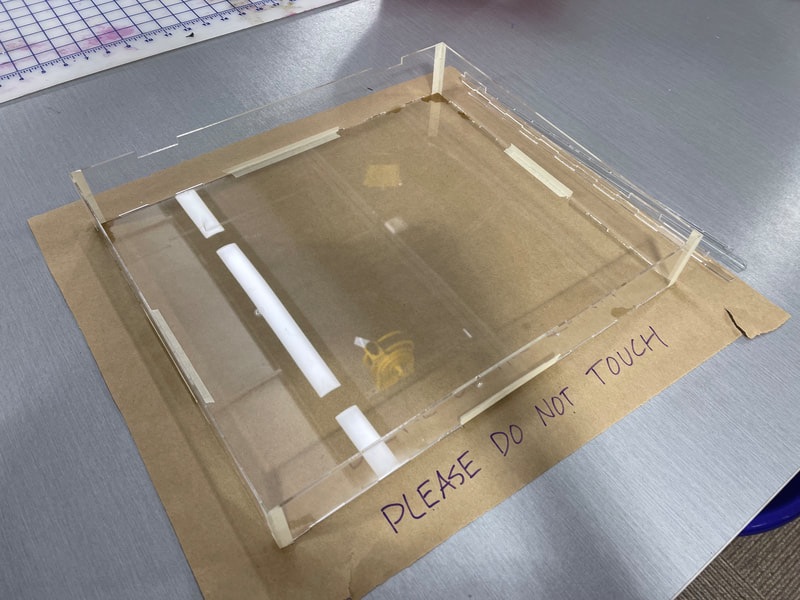
In this project, the laser was used to create the intricate cubic pattern on the front and sides of the plinth, as well as cutting out the pieces of acrylic used to make the lid. I was really happy I was able to learn to use the laser engraver and use it to enhance this project.
For the sides, the pattern was drawn up in Illustrator. Because I changed the size of my plinth so many times, these side piece designs went through a couple different iterations. Also, because I cut the pieces before sticking them on the laser, I had to find the centers of each piece, meaning some of the pieces were not perfectly aligned. In the end, I was really happy with how these pieces turned out. Although I expected the laser burns to be a lot darker, I am actually really happy with the lighter, more subtle design etched into the sides. As for the lid, the process was similar, except instead of etching or burning the surface of the wood, I was cutting through a sheet of acrylic. This piece was less stressful because the piece was bigger than the pieces I was cutting out, however because acrylic is so expensive, I only had one shot at making these pieces. The pieces cut great and I was really happy with how it was looking however, the next part, gluing, would be the hardest. The glue I had to use to bond the acrylic pieces was water-thin and super drippy, and the end result the first time around was did not go well, so I used some scrap from my last go and a new piece of acrylic to make a new lid. 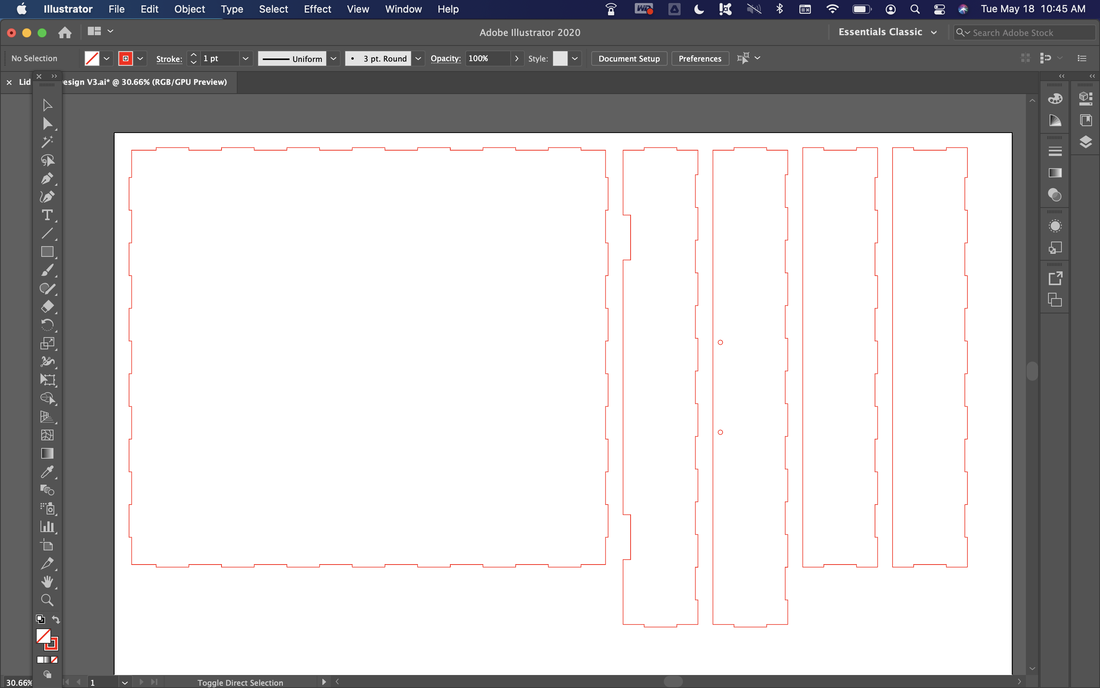
Here is what a design for the laser looks like in Illustrator. I had to darken the red lines to make them appear in this picture, because to cut on the laser these lines need to be .0001 pts thick.
|
Woodshop Tools
|
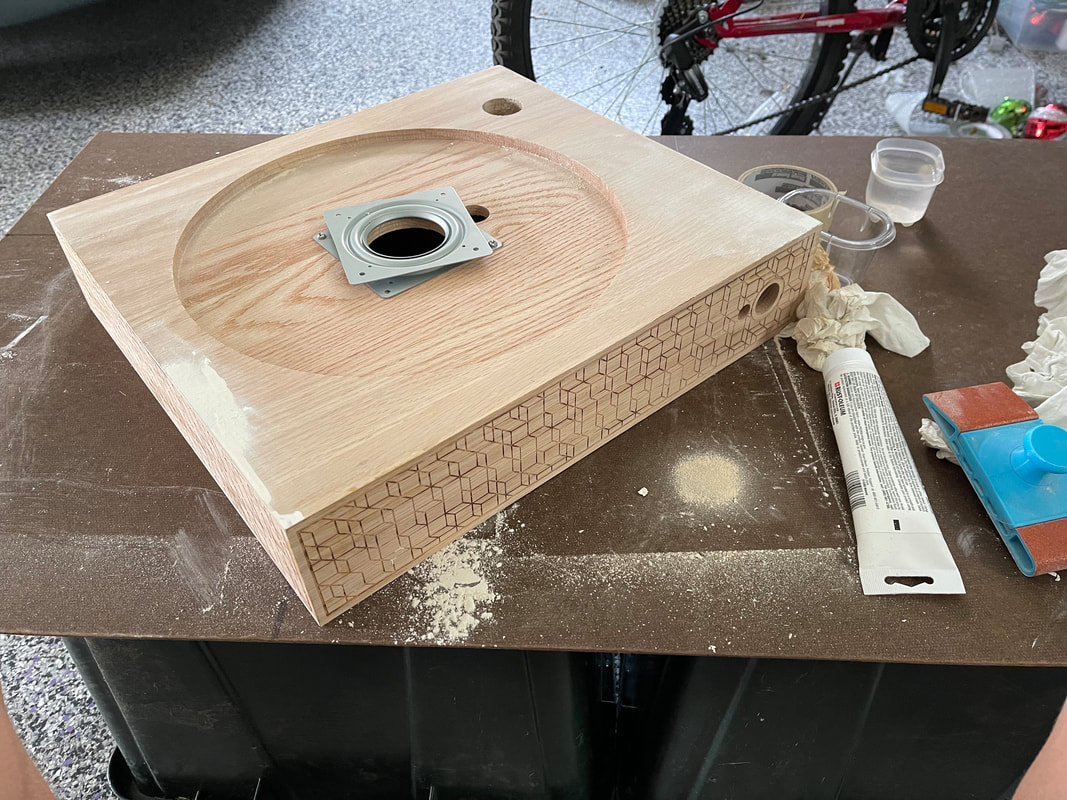
I knew from the start of this project that I wanted the main body to be made out of wood. This piece, which I am calling the plinth, is basically a simple mitered box made with four sides made out of red oak, with a bottom made from hard particle board. The hardest piece of this component, however was the plinth top, as it needed to have some holes and inlays router-ed into it
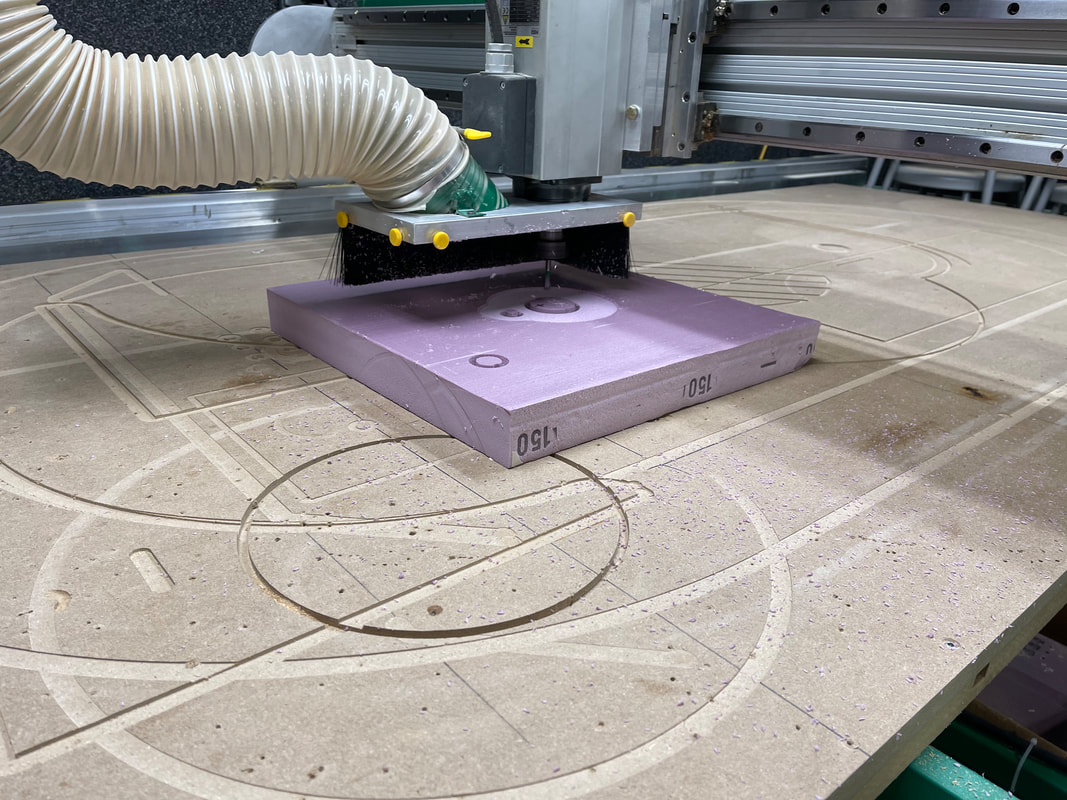
The top piece, which is a large slab of hard oak, had to have a router-ed design into it to fit the platter and tonearm. I had previously never used the CNC router before, so I was nervous but also excited to get it going. On one hand, the round holes and inlays in this design would have been very tough to to get right by hand, but if done wrong, there was a chance of ruining the entire piece. Which I almost did. We first tested the path I created on a piece of scrap foam, and it worked great. Everything was well defined and cut well. However once we moved on to the hard wood, we ran into problems. While cutting this piece, Mr. Willauer and I broke three router bits, disrupting the cut three times. Big thanks to Mr. Willauer for continuing my cut the next day. The final side pieces went pretty smooth. I cut 45 degree miters on the chop saw and table saw, then ran a dado around the bottom edge for the hard board to fit into. I then glued and clamped everything nice and tight, finishing it off with a ton of sanding and finishing work. 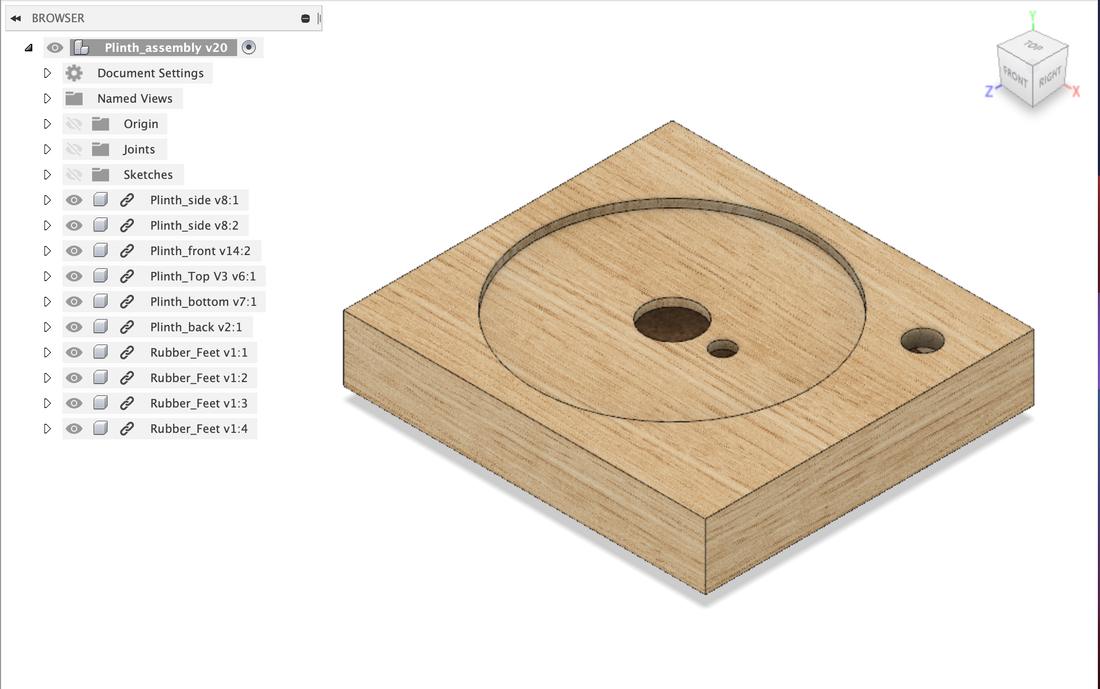
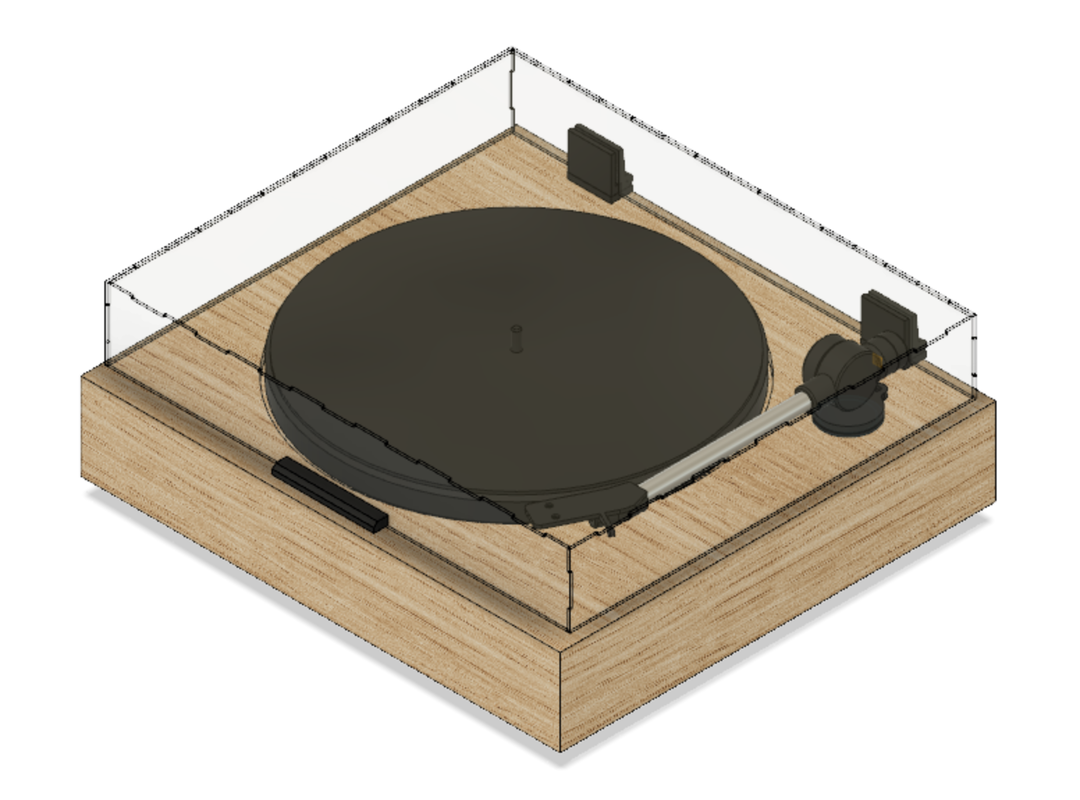
Here is what my plinth looked as it was modeled in Fusion 360. As you can see it is very close to the final version.
|
|
Electronics, Coding and Wiring
|
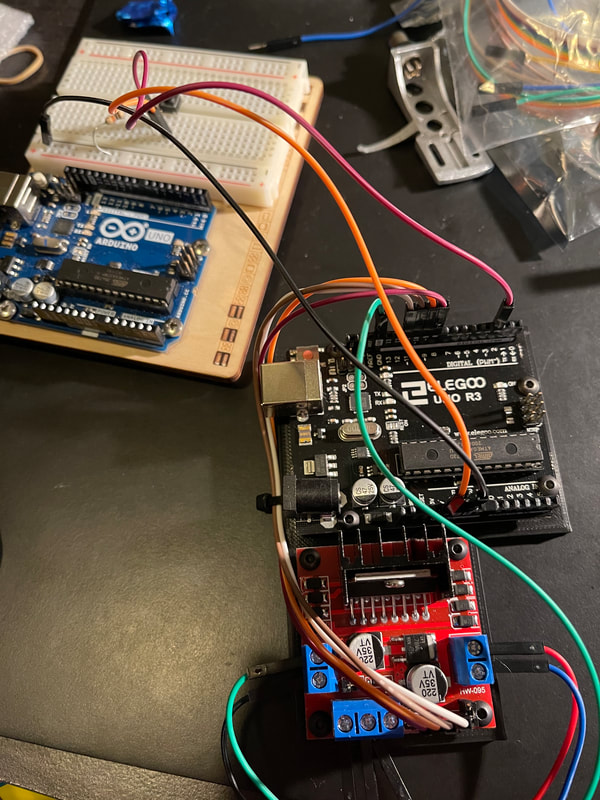
Out of every section in this project, the electronics and coding for sure gave me the hardest time. My drive system, which is what I am calling the system that controls the spinning of the platter, went through four major versions before arriving at using an Arduino and stepper motor. I was originally going to drive the platter by directly attaching a motor, but that initial method was deeply flawed, as the motor spun way to fast and didn't have enough torque. My next thought was to try and design a belt-drive system, but the belt kept slipping and jamming the motor. After that, I moved on to a gearbox, but the grinding noise it made would have for sure degraded the sound quality. My final solution was to simply use a stepper motor and Arduino.
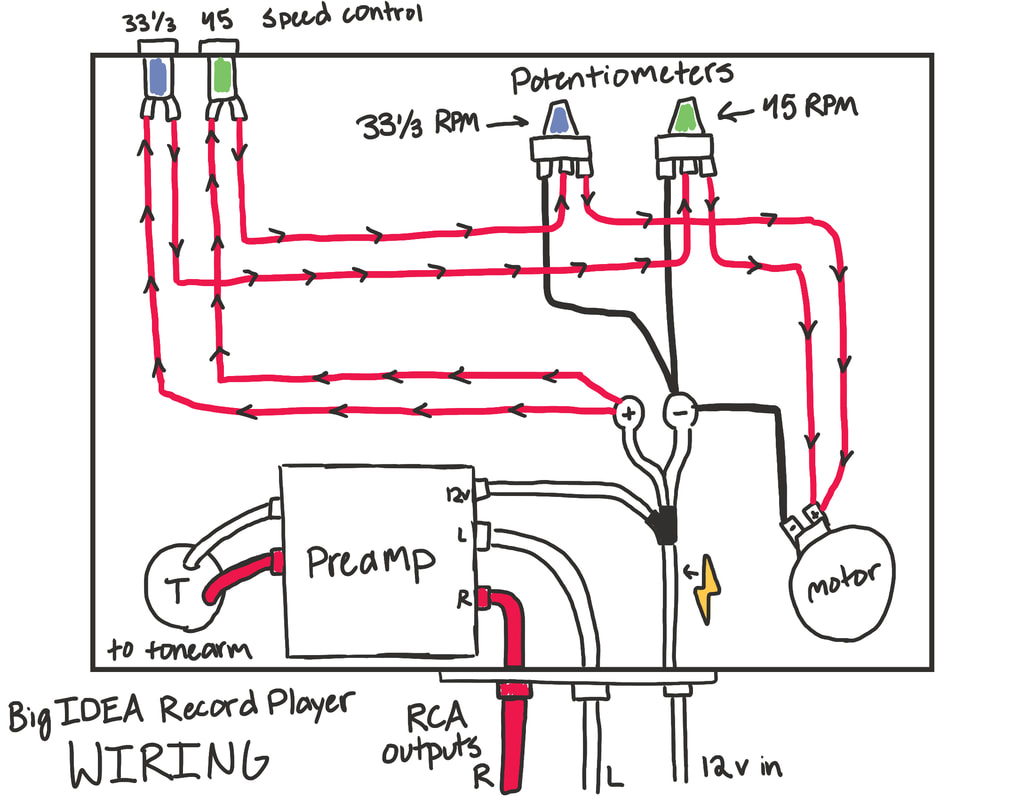
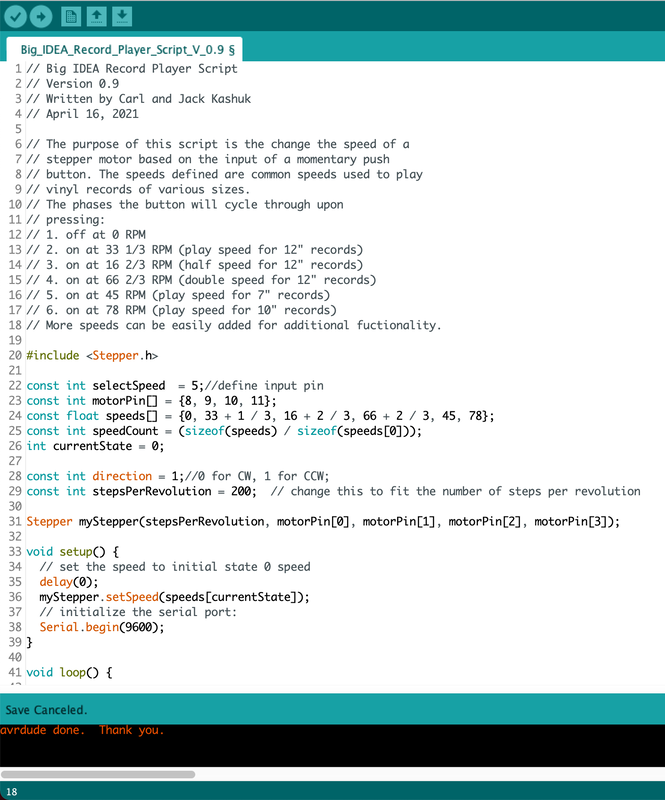
The main reasons I finally decided to pull the trigger and use a stepper and Arduino was the ease of controlling the speed through code. To get the Arduino to work well with the stepper, however, I needed to buy a small chip called the L298N stepper module. This board basically takes input from the Arduino microcontroller and translates it into small pulses of electricity, that then make the motor spin very precisely. A foreseeable downside to using this component is that stepper motors move in choppy steps. 200 steps per revolution to be exact. And although I think it will be ok for my application, it is possible it will have a slight affect on sound quality. Just a quick disclaimer: I am not good at programming. I have tried and many of the programs I write just don't work. However, my dad is a professional software engineer, therefore much of this code was revised by him (thanks Carl). A major advantage to using a coded Arduino is that I can add as many different record speeds as my heart desires. I could even add functions to make the records play backwards. What this code does is take the input of a momentary push button and cycle through speeds based on when it is pressed. There is also a latching power button that provides power to the three major electronic components, the pre-amp, Arduino, and L298N when pressed. 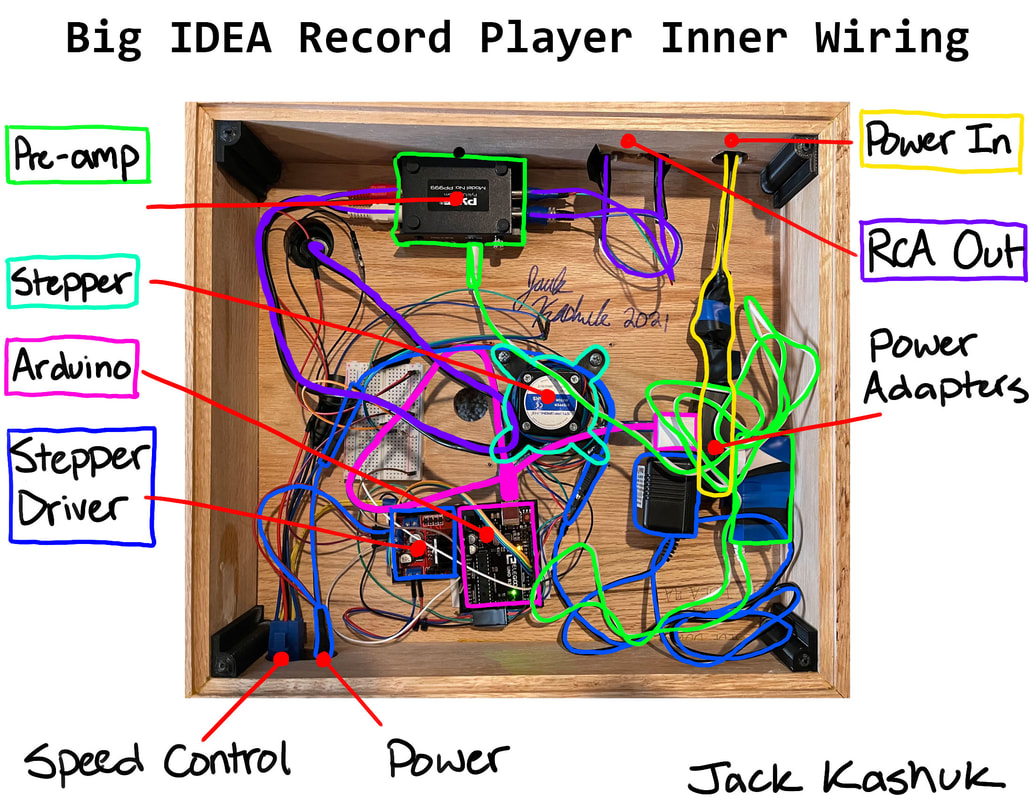
Here is what the wiring inside of my project ended up looking like. As you can see, to deal with the issue of powering my project off of a single outlet, I simply stuck an extension cord inside. It may not be the nicest looking, but it works so that's all that matters.
|
FINAL PRODUCT
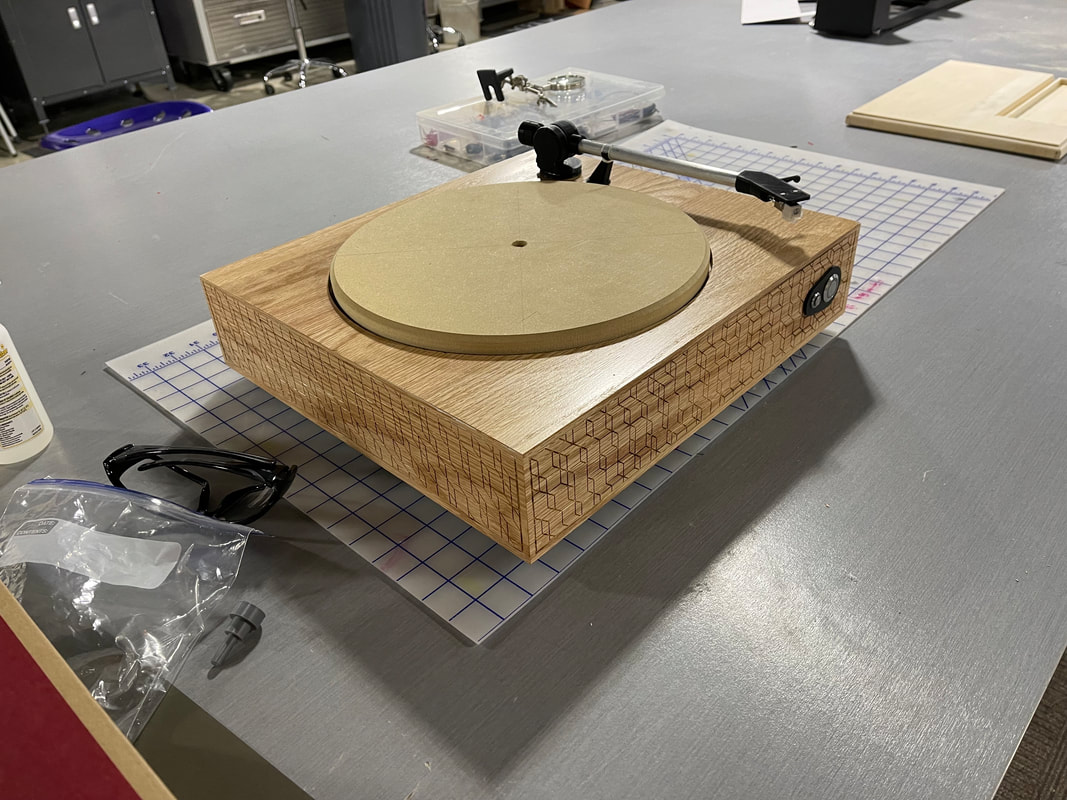
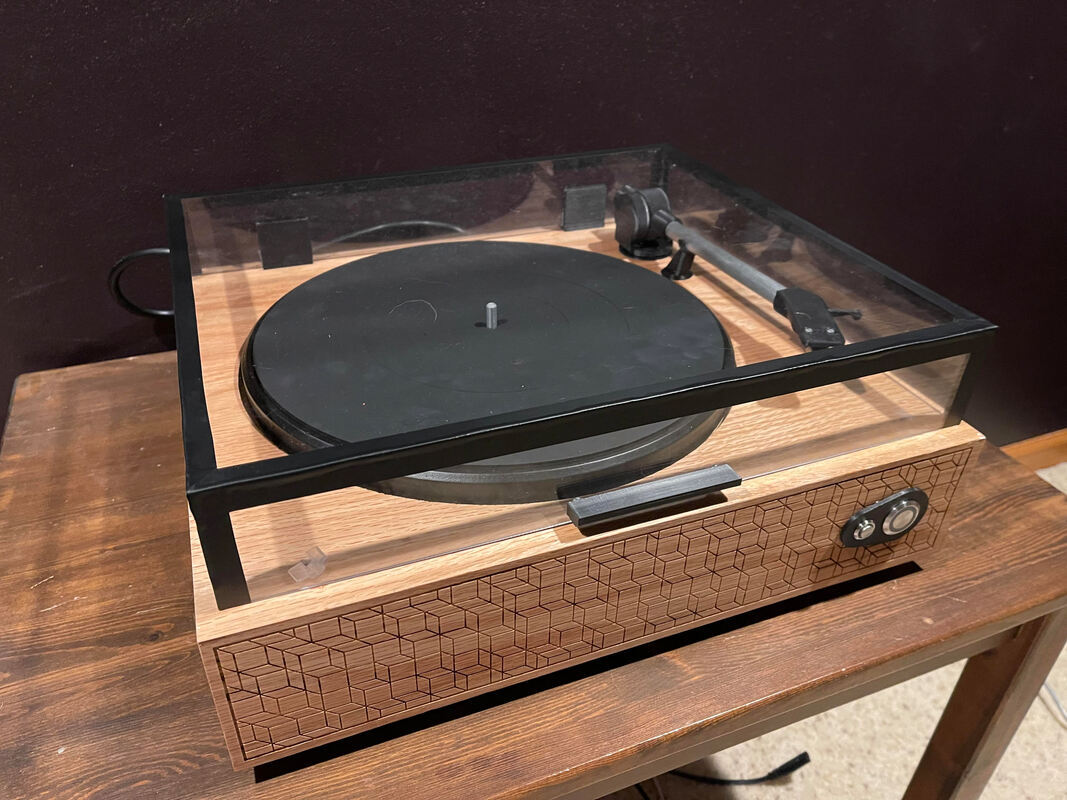
Modelled vs. Produced
|
|
Videos of Functionality
The link above will bring you to a video of my project performing its assigned function: playing vinyl records. I made sure to pick songs with variance, because I wanted to show off the range of this turntable.
Also included are the sound tests I performed while in the process of making this project.
Also included are the sound tests I performed while in the process of making this project.
CONCLUSION
Like I had said before, this project quickly became one of this most difficult and complex things I have ever made. There were so many parts that had to work in harmony to make this project work. Along with the all-important skill of time management, I would say I learned how to refine my skills on many of the machines in the Innovation Center, as well as my own 3D printer. I am extremely happy with how this project turned out in the end.
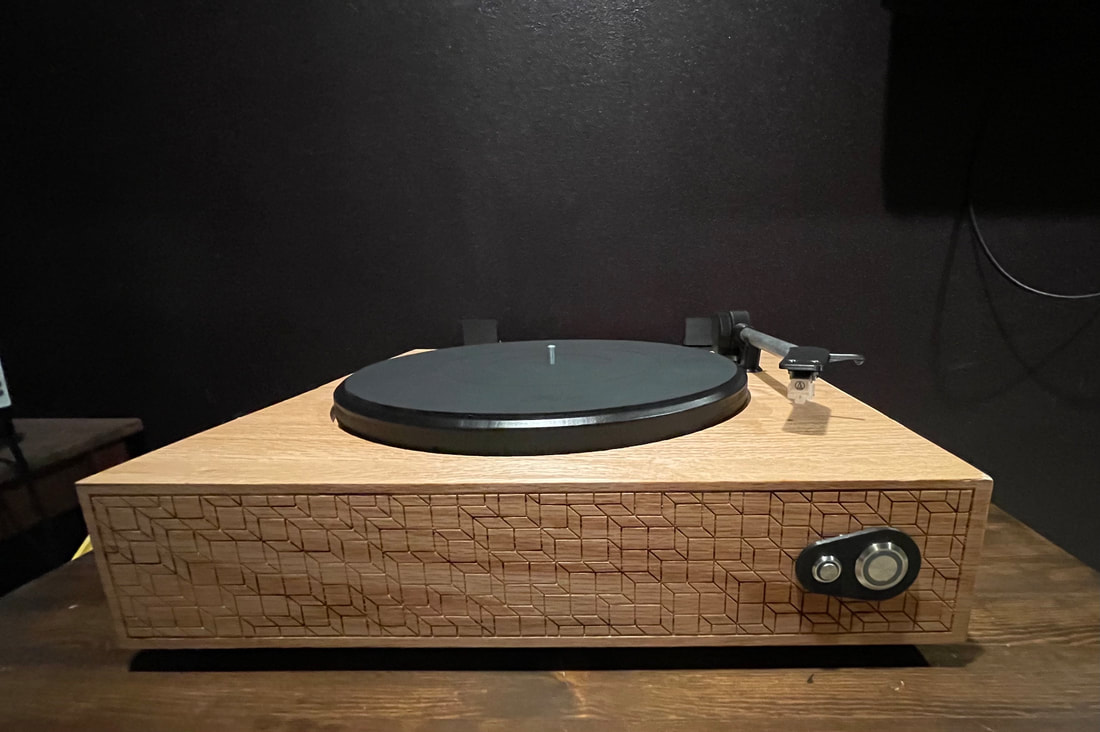
The design is pretty simple. A natural wood box with black 3D printed components and a basic, clear acrylic lid with custom hinges. On the front there are two metallic LED buttons, one for master power and the other for speed control. Out the back there is the two RCA outputs with a custom shield. There is a thick black power cord coming out the back as well; no power bricks or adapters are visible. There are four rubber feat that act as where the bottom panel is screwed on as well. The inside is not nearly as neat. In fact, I would best describe it as a rat's nest. There are three main components that need power, which was a very big area of challenge for this project. I eventually arrived on using a black extension cord inside of the plinth for power. Everything is adhered to the plinth top, making foreseeable maintenance as easy as flipping the record player over and unscrewing the bottom panel.
Throughout this semester, I have learned many different things, from coding to an Arduino and wiring up a stepper motor, to using the CNC router and laser engraver. I also learned to take my time: rushing things on this project could have easily been disastrous. There were many pieces that needed to be well finished and precisely cut, meaning I had to slow myself down to achieve these goals. I took my time to sand and finish the plinth and platter, and took my time to solder components that needed it. Another essential thing I learned is patience. There were so many times throughout this project that I wanted to rush through and just get it done, but I knew to pace myself and get stuff done the right way. Along with patience was also waiting for other students to be done with their jobs on the laser or router. There were some classes where I was unable to use these machines, and I had to wait, but that also meant I could go back and refine my designs.
There were some areas of improvement I could identify for my project. Although I am extremely pleased with how the wood plinth looks, I would not have used the white wood filler to fill the gaps between the different pieces, as it is off color. I also would have been much more carful with the acrylic cement, as there are some rough and foggy areas on my lid that could have been prevented if I had known what I was doing. This was my first time using this glue however, so I think it is good enough. One last improvement I would have made, which was to use hindsight and print pieces only when I knew they were what I wanted. Like I had said earlier, some of the pieces for the tonearm went through over half a dozen different iterations, which could have been prevented if I had thought about the design a little better the first time around.
Overall, I think this is my favorite thing I have ever done in school, and it might be my favorite thing I have ever made. In my opinion, the design is super nice and the sound quality I have gotten out of it has blown me away. I had some initial fears that I would destroy records if I tried to play them on a homemade turntable, but I am confident that this project will be more than good enough for awhile to come. And although I already have some modifications in mind, I am very proud of what I have achieved with this project this semester.
